PHP Link Directory Version 5 Manual
- Introduction and Downloading phpLD
- Installing phpLD
- Setting Up Your Site
- Directory Menu
- Widgets
- Pages
- Link Types
- System Menu
- Theme Menu
- Setting Menu
- Site Settings
- Directory Settings
- Menu Settings
- Admin Settings
- Payment Settings
- Link Submit
- Featured Link Settings
- Reciprocal Link Settings
- Link Comment Settings
- Link Rating Settings
- Author Settings
- Email Config Settings
- Email Template Setup
- Search Engine Optimization
- Form Fields
- Security Settings
- Emailer
INTRODUCTION
Welcome to the PHP Link Directory Version 5 manual. We're happy you've taken the leap and decided to join the PHP Link Directory family!
Just as our product continues to improve, our manual is a work is a work in progress that we will continue to update as our product changes.
Here we will cover everything you can do with PHP Link Directory, and show you how to get the most out of your purchase.
For anything that is not covered in this documentation, please se have a number of different ways to help you!
phpLD Support
DOWNLOADING
After you've purchased your license, you can download your copy. If you haven't purchased, here's how you do it.
First, go to http://www.phplinkdirectory.com and look to the right top corner of the page.
You'll see this:
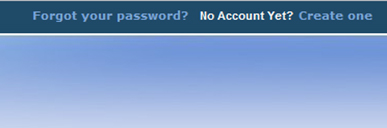
By clicking on the Create One link, youll be brought to a form where you need to fill out your information. Click register, and check your email for your confirmation link. Once youve created your account, you need to sign in. Look to the top left of the site, and sign in as shown here:
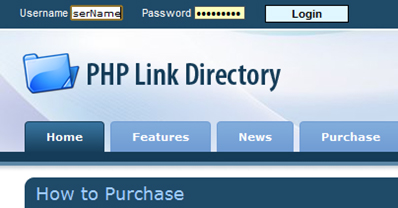
After you have finished signing in, you can buy a phpLD package. There are two kinds, one that requires a linkback to phpLD, and once that does not. After you have purchased, you can download it.
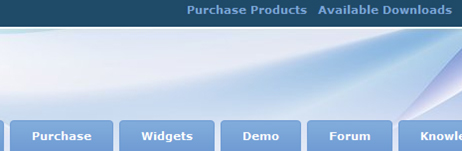
Look to the top right of your screen, and you will see these links. Click on Available Downloads, and you will be brought to the page where you can download. Make sure you look the email sent to you after after registration. You need to validate your email before you can download the product. If you have any trouble downloading, feel free to create a support ticket and we will help.
Once you have purchased and downloaded your Available Downloads screen will look like this:
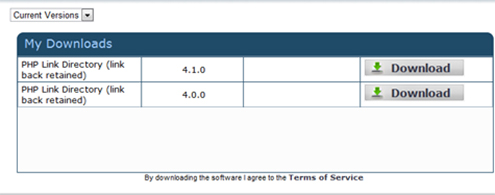
There are three columns. The left column displays your package and its link back status, the middle displays the version number of your package, and the far right is the link for download. As you can see here, you will have the latest version available for download, and the version before that. Its best to download the newest version, but if it doesn't work, try the earlier version. After youve downloaded your package, you need to prepare for =ation onto your server.
By clicking on the Create One link, youll be brought to a form where you need to fill out your information. Click register, and check your email for your confirmation link. Once youve created your account, you need to sign in. Look to the top left of the site, and sign in as shown here:
After you have finished signing in, you can buy a phpLD package. There are two kinds, one that requires a linkback to phpLD, and once that does not. After you have purchased, you can download it.
Look to the top right of your screen, and you will see these links. Click on Available Downloads, and you will be brought to the page where you can download. Make sure you look the email sent to you after after registration. You need to validate your email before you can download the product. If you have any trouble downloading, feel free to create a support ticket and we will help.
Once you have purchased and downloaded your Available Downloads screen will look like this:
There are three columns. The left column displays your package and its link back status, the middle displays the version number of your package, and the far right is the link for download. As you can see here, you will have the latest version available for download, and the version before that. Its best to download the newest version, but if it doesn't work, try the earlier version. After youve downloaded your package, you need to prepare for =ation onto your server.
PREPARING FOR INSTALLATION
Now the fun part begins! Before we start, you need to make sure you have an FTP client, we recommend you use Filezilla:
http://www.filezilla-project.org This allows you to upload PHP
Link Directory into the root folder on your server, or a folder of your choice. There are of course many alternatives, and you can choose to use the one you are most comfortable with.
Upload the zip file of phpLD that you downloaded to your server, and then unpack it.* When the archive unzips, you'll now see a new directory in your folder named phpld. You can leave it this way, but we suggest you move the folder contents into the root directory, so you don't have to redirect urls and change other important settings. There are two ways to put phpLD into your root directory: Cpanel and FTP.
* Some may choose to run locally on windows instead of a web server. We only provide very limited support for installation that we cannot access on a web server.
CPANEL
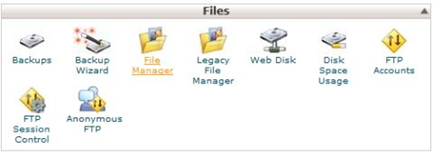
After logging in to Cpanel, find the selection for File Manager, press the OK button that comes next, and you'll see your entire directory tree listed on the left hands side with the files of the currently selected directory listed on the larger right hand side. Find the public_html (or root, if your host doesn't provide this) directory listed on the left hand side and select it. You should now see a list of all the available sub-directories of public_html (or root) listed on the left hand side, now find the phpld directory and click on it.
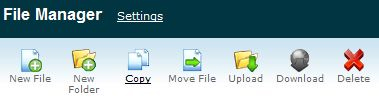
Now you have a complete file and directory listing of your /public_html/phpld directory on the right hand side. The easiest way to accomplish the copy is by clicking on the Select all check box that is on the minitoolbar directly above the list:
FTP
The second way you can copy files into the main /public_html directory is by using an ftp program to upload and manipulate the files.
In your ftp client, you can highlight directories and files on your server and move them to the /public_html directory, or you can unzip
the archive on your local machine and upload the files from your machine to the directory you want them to be in on your server.
Once the files are in the right place, you're now ready to prepare for the installation. You can find these same instructions in the main directory of you phpLD installation, in a file called installation.txt
First, rename the file /include/config.php.new to /include/config.php (just delete the .new at the end)
chmod the permissions of config.php to 777*
Use chmod to change the permissions of these directories:
/temp
/temp/adodb
/temp/cache
/temp/templates**
* If your host uses enhanced security methods, or you're running phps uexec using chmod permissions of 755 will work. Examples of hosts that may require this are HostGator and HostDime
** If the listed directories/folders do not exist, then please create them with the proper permissions so your install will be successful.
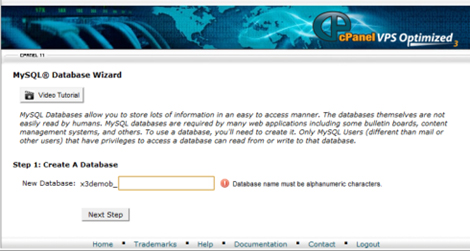
DATABASE SETUP
The last step in preparing for phpLD installation is setting up a database for phpLD to use. Log into your host Cpanel and create a new database. In Cpanel it will look like this:
You now need to add a new user to the database you have just created. This account will be used by phpLD in order to access the database as needed for operational reasons.
When creating a new user and database, remember to create a hard to guess username and password! This can be accomplished by adding some random numbers in with the username and password, and it should always be different than the username and password you log into your cpanel account with! To add new users, just enter their information, and then add them to a database like in the picture below:
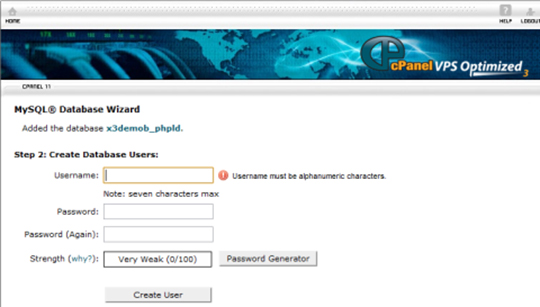
In order for phpLD to be able to create and delete tables and fields, you will need to give it all privileges; Select, Insert, Create, Alter, Update, Drop, Delete, Lock Tables, Index, References, Create Temporary Tables, Create Routine, or all the permissions should be checked. This allows your phpLD installation to complete successfully.
Take note of usernames, passwords, and all the other pertinent information you will need. If need be, you can just leave your administration window open so you can just copy and paste the information into the setup pages. Once you've finished adding the user to the new database, you're ready to move on to installing your new directory.
You now need to add a new user to the database you have just created. This account will be used by phpLD in order to access the database as needed for operational reasons.
When creating a new user and database, remember to create a hard to guess username and password! This can be accomplished by adding some random numbers in with the username and password, and it should always be different than the username and password you log into your cpanel account with! To add new users, just enter their information, and then add them to a database like in the picture below:
In order for phpLD to be able to create and delete tables and fields, you will need to give it all privileges; Select, Insert, Create, Alter, Update, Drop, Delete, Lock Tables, Index, References, Create Temporary Tables, Create Routine, or all the permissions should be checked. This allows your phpLD installation to complete successfully.
Take note of usernames, passwords, and all the other pertinent information you will need. If need be, you can just leave your administration window open so you can just copy and paste the information into the setup pages. Once you've finished adding the user to the new database, you're ready to move on to installing your new directory.
INSTALLING PHPLD
Installing phpLD has many steps. Follow the guide below and your site will be up and running in no time at all!
STARTING INSTALLATION
Once youve finished getting the package onto your website, setting up the database, youre ready to begin installing phpLD on your website. The setup process
is quick and painless, and youll be up and running in no time. To start the installation process,
open your browser and type in the url of your directory, i.e.
http://www.your-new-directory-site.com/ you should automatically be redirected
to the installation page. If you're not directed, try typing in http://www.your-new-directory-domain.com
and you should now see the first
page of the installation as shown in the picture below:
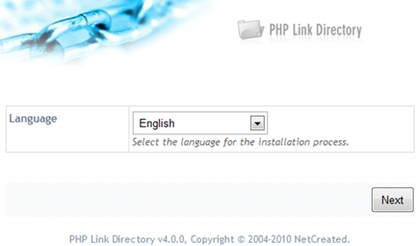
Please select your language, and hit the next button.
Please select your language, and hit the next button.
COMPATIBILITY TEST
You will now be brought to the compatibility check screen, where a script will run and check to see if your server is
able to install and run phpLD successfully. All options should have a green checkmark as shown here:
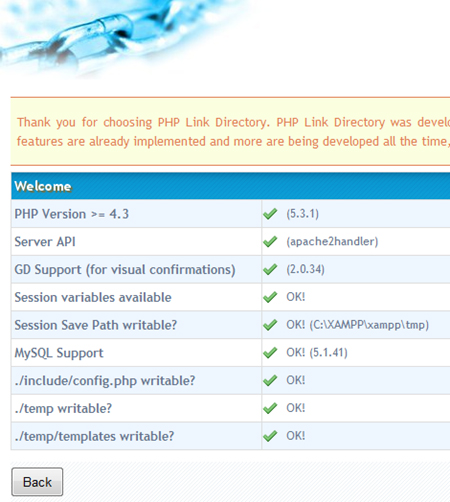
If they are not green, please contact support on our forums at http://www.phplinkdirectory.com/forums Please be aware that if your server is not running up to date installations of PHP or MySQL, it cant be resolved by support, and you will likely have to find a different webhost who provides updated servers. Once everything on this screen has a green checkmark, please proceed to the next screen by clicking on the Next button.
If they are not green, please contact support on our forums at http://www.phplinkdirectory.com/forums Please be aware that if your server is not running up to date installations of PHP or MySQL, it cant be resolved by support, and you will likely have to find a different webhost who provides updated servers. Once everything on this screen has a green checkmark, please proceed to the next screen by clicking on the Next button.
DATABASE SETTINGS
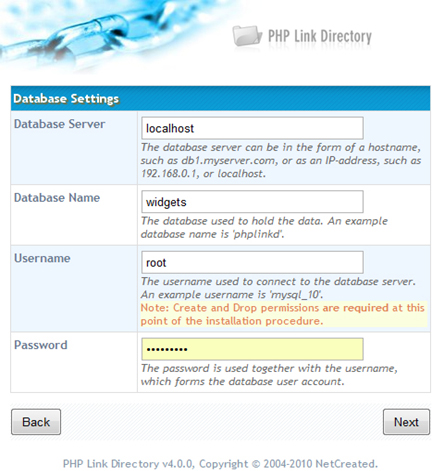
If you've entered the information correctly, you'll be taken to the next step.
If not, you'll get a notice, and be asked to hit the back button and reenter the right information.
If you're still having trouble, check your hosts' database information again to make sure you have the right information entered.
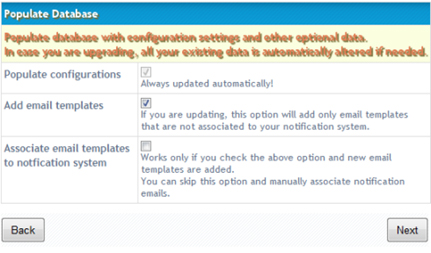
POPULATING DATABASE
Now youve reached the populate database part of your installation. Select all the options, and click Next as seen in the picture below:
Now youve reached the Administrative User page. This part of the installer is where you create your account to log into phpLDs administrative system. Be very careful when
you create your admin and password here. Make sure its not the same as your database log in, your email login, and your hosting log in.
This is for security, in the rare case that phpLD is breached, it will limit what information people can get hold of.
ADMINISTRATOR USERNAME is the username you will log in with.
ADMINISTRATOR NAME is the name that will be displayed in system emails and your posts.
ADMINISTRATOR PASSWORD is what your password is, and confirm ADMINISTRATOR PASSWORD is just to make sure you have entered the same password twice.
ADMINISTRATOR EMAIL is the email address that all system information will be sent to. If you forget your password, it will be sent here. Be sure to set it to one you check frequently!
ADMINISTRATOR EMAIL is the email address that all system information will be sent to. If you forget your password, it will be sent here. Be sure to set it to one you check frequently!
Congratulations!
Congratulations! Youve reached the final step in your phpLD installation.
Take care to notice the warnings about deleting your installation directories. CHMOD THE PERMISSIONS TO YOUR /INCLUDE/CONFIG.PHP FILE TO 444 OR 000.
You can now do one of three things:
Go to your admin panel for your site by clicking on REDIRECT TO ADMIN CONTROL PANEL
Go to the main page of your site by clicking REDIRECT TO YOUR DIRECTORY
RESTART INSTALLATION is if you need to change your installation, and is basically an option to reinstall. If you do need to reinstall, be sure you clear your database or use a separate one, to prevent any hiccups.
SETTING UP YOUR SITE
Setting up your new phpLD site may seem daunting, but once you break down all the options,
youll find its pretty simple! Here well go into detail of what each option does and how
you can get the most out of your phpLD site and how things work.
LOGGING IN TO THE ADMIN PANEL FOR THE FIRST TIME
You will reach this page for the first time usually after you install.
If you didnt arrive here, and are not sure how to get here,
the address will be http://yoursite.com/admin/login.php When you log into the admin panel for the first time,
you will see a screen like this:
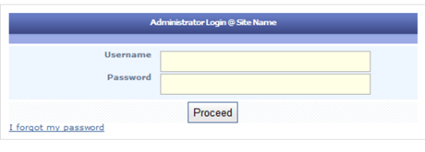
Now enter the username and password you created during installation. Please keep in mind it's your username, not your display name! If you've forgotten you password, you can click the I forgot my password link, and the system will email you your password to the email you provided during installation.
Once you've successfully logged in, you'll be brought to the admin area. It'll look like this:
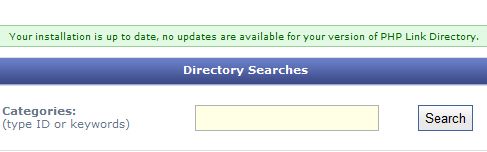
All green means youve installed everything correctly. If your screen has some red warnings like the picture below:
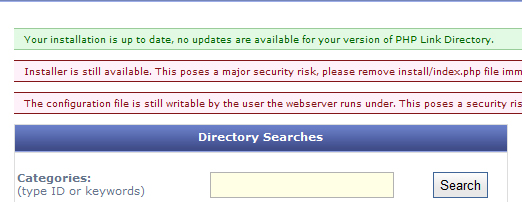
Youve done something wrong! Dont despair! This is what the warnings mean: INSTALLER IS STILL AVAILABLE means you forgot to delete the index.php file in your install folder. Do so now to prevent any kind of security issues.
THE CONFIGURATION FILE IS STILL WRITABLE BY THE USER THE WEBSERVER IS UNDER means you didnt chmod your files to read only, please do so now to prevent any security issues! Now refresh the page and once your admin panel reflects the all green status, its time to start customizing your website and get it running!
Now enter the username and password you created during installation. Please keep in mind it's your username, not your display name! If you've forgotten you password, you can click the I forgot my password link, and the system will email you your password to the email you provided during installation.
Once you've successfully logged in, you'll be brought to the admin area. It'll look like this:
All green means youve installed everything correctly. If your screen has some red warnings like the picture below:
Youve done something wrong! Dont despair! This is what the warnings mean: INSTALLER IS STILL AVAILABLE means you forgot to delete the index.php file in your install folder. Do so now to prevent any kind of security issues.
THE CONFIGURATION FILE IS STILL WRITABLE BY THE USER THE WEBSERVER IS UNDER means you didnt chmod your files to read only, please do so now to prevent any security issues! Now refresh the page and once your admin panel reflects the all green status, its time to start customizing your website and get it running!
DIRECTORY MENU
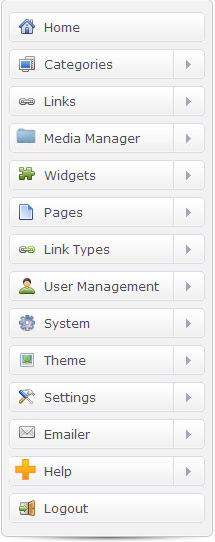
On the left hand side of your admin panel, you will see the Directory Menu. This is the heart and soul of your phpLD package, and where everything happens. Below you will find explanations of what everything does. Please pay special attention to the SETTINGS MENU information, especially if youre going to want to make money with your website and really dig into the special features of phpLD.
CATEGORIES
The Categories Menu lets you see what categories are available on your website. Here you can add categories and approve user submitted categories.
To get started with your website, you will need to add categories so you can get started on your content. Make sure this is your first step!
LINKS
The Links Menu displays links, allows you to approve or delete user submitted links, review links, validate links, manage link comments,
and approve or delete link comments waiting in the queue. If you will only be submitting content in your directory,
you can skip this menu. But, this is php LINK Directory, so take advantage of linking, especially the paid linking to maximize your profits.
MEDIA MANAGER
The Media Manager allows you to upload and manage your media.
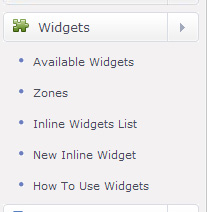
WIDGETS
The Widgets Menu displays available installed widgets, zones (where the widgets are displayed in the layout),
and how to use widgets help guide. If you want to code your own widgets, please refer to the guide so you can get on your way.
AVAILABLE WIDGETS
Choose which widgets you want to show by clicking the green plus icon.
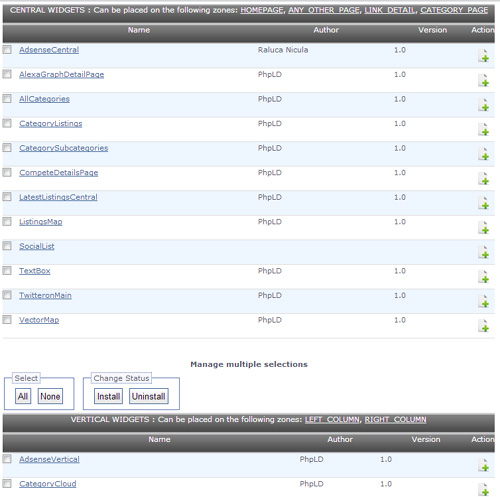
You will then be directed to a new page
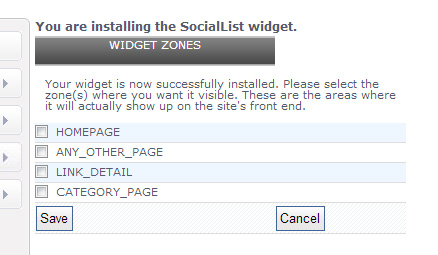
Where you can choose where to display the chosen widget.
ZONES
Shows available ones and widgets that are enabled for them
INLINE WIDGETS
Shows a list of available inline widgets
NEW INLINE WIDGET
Create new inline widgets.
HOW TO USE WIDGETS
Tutorial for using and adding widgets.
AVAILABLE WIDGETS
Choose which widgets you want to show by clicking the green plus icon.
You will then be directed to a new page
Where you can choose where to display the chosen widget.
ZONES
Shows available ones and widgets that are enabled for them
INLINE WIDGETS
Shows a list of available inline widgets
NEW INLINE WIDGET
Create new inline widgets.
HOW TO USE WIDGETS
Tutorial for using and adding widgets.
PAGES
The Pages Menu lets you create new pages, manage current pages and list pages. These pages are similar to wordpress pages,
letting you not only have a content filled site, but separated static pages to display information like contact, FAQ's, etc.
An example of this might be a page where you let potential advertisers know prices for reciprocal links, featured links, and more.
LINK TYPES
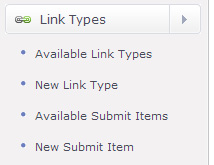
The Links Types Menu allows you to set submission types. featured, regular or other types of submissions. Also lets you create new submit items and set which ones show on submit and details pages.
AVAILABLE LINK TYPES
Here you can create your link types.
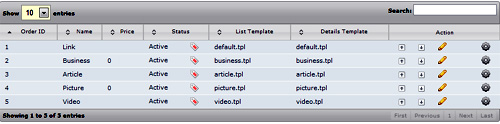
By default PHPLD5 comes with 5 Link Types already set. Link, Business, Article, Picture and Video.
To edit these click the pencil icon. You will then be able to set price, deep links, featured and duration of the link type.
By clicking the cog/wheel icon you can decide which fields are available for submission and display on listing.
NEW LINKS TYPE
Create a new link type.
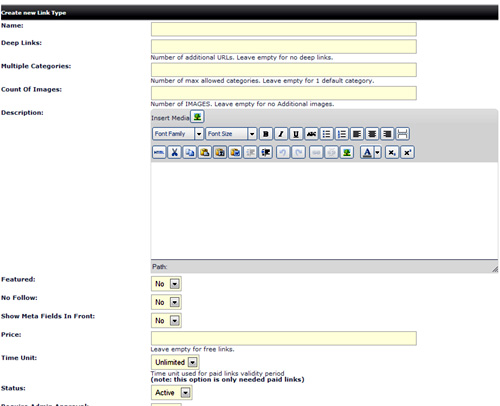
Fill in the page starting with Name: This could be something like "1 Year Featured" the fill in how many deep links you will allow etc etc. Then work your way through the form and Save. Then go to available link types and click on the cog/wheel icon and select which fields you want to allow for this link type.
Fill in the page starting with Name: This could be something like "1 Year Featured" the fill in how many deep links you will allow etc etc. Then work your way through the form and Save. Then go to available link types and click on the cog/wheel icon and select which fields you want to allow for this link type.
AVAILABLE SUBMIT TYPES

This shows a list of all Submit Items. Click the pencil icon to edit
NEW SUBMIT ITEMS
Create a new submit item by filling in the form starting giving it a good discriptive name.
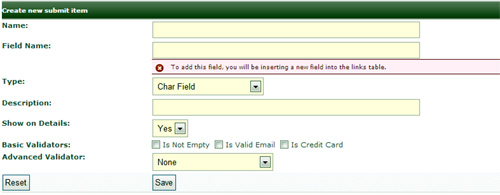
Field type you have eleven to choose from.
Choose whether to show on the details page.
Then choose basic or advanced validators and Save.
Field type you have eleven to choose from.
Choose whether to show on the details page.
Then choose basic or advanced validators and Save.
USER MANAGEMENT
The User Management is how you manage your site's users, and edit them.
You can limit a users posting abilities, elevate them to an administrator, and other useful options.
SYSTEM MENU
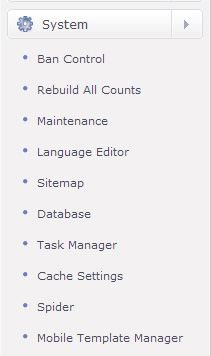
The System Menu is the soul of the system, and allows you to customize the look and feel of your site. Edit email templates, manage your templates, and a language editor are the first few options, and what they do is self-explanatory.
BAN CONTROL
Ban Control allows you to ban IP's, URL's, Emails and words
to help you reduce the amount of spam submissions
REBUILD ALL COUNTS
Updates the count of your listing that is shown in the round braces right after category name
MAINTENANCE
Maintenance will build or rebuild custom meta tags for every category and detail link pages.
LANGUAGE EDITOR
Edit the language files. Add new phrases or correct the language files if wrong.
SITEMAPS
Sitemaps allow you to feed pages you want indexed directly into search engines.
This lets visitors and search engines find more of your content, and you get a smarter crawl and better results.
This is a great SEO tool, be sure to utilize it.
DATABASE
The Database Menu allows you to change database settings, backup your database for safe keeping,
and add fields for database tables (for advanced users only!) You may wonder why you would want to back up your database.
In the event of a server issue, you will have a backup so you wont lose any of your information.
Its good to back up your database weekly or monthly, depending on the size of your site.
TASK MANAGER
Used to run various tasks by chron job. Check expired links, Rebuild category cache, Check Reciprocal Links
CLEAN CACHE NOW
Clean Cache Now clears the database cache. Its good to clear this every once in a while,
and you can set a chron job (periodic server task) here in the settings menu.
In the sub-menus you can automatically clear the website cache, and cache settings
lets you adjust options like if the database caches, and timeout for caching.
CACHE SETTINGS
Turn on database caching to reduce server load. When activated Clean Cache Now will appear in the menu above this.
SPIDER
The Spider panel lets you import items from Google and DMOZ (the open directory project),
to flesh out your directory. Link Payments and Article Payments lets you manage paid links and listings on your website with ease.
Profile lets you manage your site profile.
MOBILE TEMPLATE MANAGER
Select and activate your Mobile Template to show when browsed by mobile devices.
Theme Menu
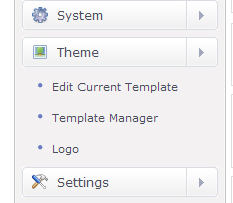
EDIT CURRENT TEMPLATE
Here you can define the layout of your directory pages.
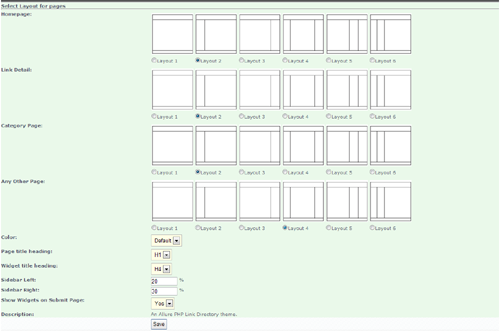
You can alter the layout of individual page types, set columns shown, choose color, set column widths.
You can alter the layout of individual page types, set columns shown, choose color, set column widths.
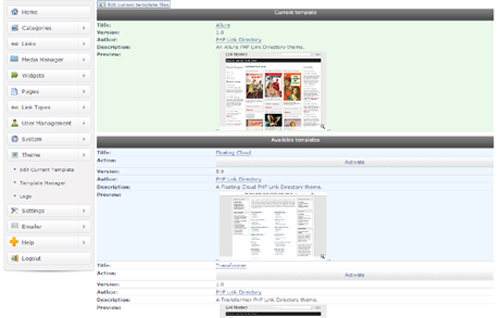
TEMPLATE MANAGER
Choose your template from listed templates and click Activate.
LOGO
Here you can add a logo to your template. If you do not use a logo the Site Name will be displayed in the Logo position.

Click Choose File and select your logo image. Click Save.
A new screen will now be displayed showing Your logo image.
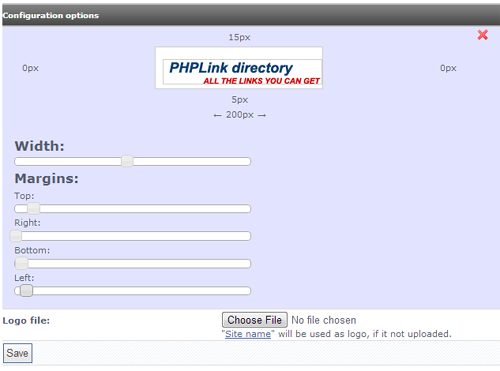
Using the sliders you can now position your logo by altering the margins. As you move the sliders you will see the position effect on the your image.
Click Choose File and select your logo image. Click Save.
A new screen will now be displayed showing Your logo image.
Using the sliders you can now position your logo by altering the margins. As you move the sliders you will see the position effect on the your image.
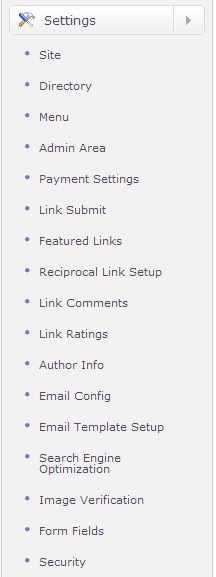
SETTINGS MENU
Settings is the technical panel of the site where you can set up things like linking systems, payments,
author information and the like. Here we will explore what each setting does, and how to get the most out of the Settings Menu for your directory.
SITE
In the Site subsection, you'll find a number of settings categories need to function correctly:
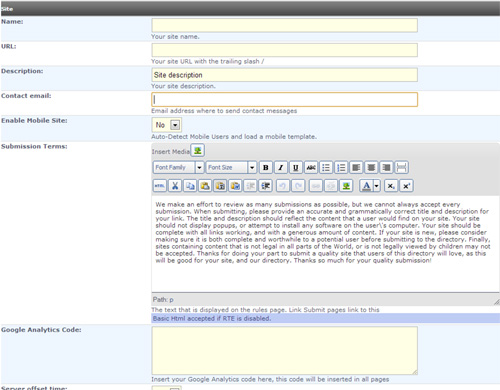
NAME
Name is where youll enter your site/directory name. Be sure to choose wisely, this will be indexed by search engines that spider your directory for content.
URL
URL is your site's URL, or web address of your directory. This will tell the database where everything is,
so be sure you write the right address in here. Remember to include a trailing slash / in the URL.
DESCRIPTION
Description is the default description for your directory as it will be seen by the search engines,
it's important to work on this so you'll get the best ranking. Be as clear and concise, and dont just enter in a jumble of keywords here.
CONTACT EMAIL
Contact email is where you will put your email in for notices.
When a new user signs up for the site, or the system needs to send you a notification pertaining to the site, it will go to this address.
It can be the same as your administrative account email address.
MAIN CONTENT
Main content is an important field, because there's no need to manually change the templates in order to display messages on your main page.
Simply type the message in here and it will be displayed for your users to see. You can take advantage of the text formatter here,
and you can paste from other applications (web, word, etc) and it will retain the formatting.
SUBMISSION TERMS
Submission is the default message here when you install phpLD. This is the message your users see when they submit a link or article and click on the submission rules link.
You can adjust your submission terms to fit your directory. Most users will find the default submission terms to be more than adequate for their needs,
but adjust them accordingly if you need to!
SERVER OFFSET TIME
The Server Offset Time option lets you change the time zone of your directory to match you, your users, or the area you're serving. This is great because most people
DIRECTORY
In this panel, you'll have access to how phpLD displays information to your visitors,
and to you as the administrator. Here we will go through all you need to know about Categories and how to use it wisely.
Below is a picture of what the Categories settings page looks like:
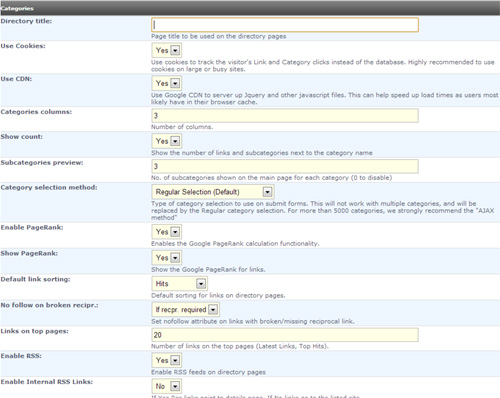
CATEGORIES COLUMNS
The Categories Columns field is the number of columns that will be used when phpLD lists out your category index on the main page of your directory.
You can list as many or as few as you want, but at least five is a good idea.
SHOW COUNT
The Show Count field shows categories of your directory that are listed, so you can show the number of subcategories or links next to the category's name by selecting Yes here.
If you dont want people to see how many are in that category, you can select no, but we dont recommend this!
SUBCATEGORIES PREVIEW
The Subcategories Preview field allows you to control the number of subcategories that are listed in your category index by typing the desired number of categories here.
If you input a 0, this field will only display the category name and nothing else. We dont recommend you disable this option,
it helps search engines index your site properly and will improve your search rankings for more traffic.
CATEGORY SELECTION METHOD
The Category Selection Method Field lets you select the way your users can select the category on a submission page when users are adding content to your site.
If you have a large number of directories (over 5,000) the AJAX method would be best to use. Even if you have a small amount of categories, ajax looks great!
ENABLE PAGERANK
Enable PageRank enables Googles PageRank calculation functionality. PageRank is great in terms of SEO for your directory,
and its recommended that you enable this for the best results with your phpLD site.
Show PageRank enables each pages PageRank to be displayed. If you dont want this public, please select no in the field.
SHOW ONLY LINKS WITH CONFIRMED EMAILS ON APPROVAL PAGE
Wait for Email Confirmation is a good option if you want to have the server delete posts and users who dont confirm their email addresses.
Another time and spam saving feature, by enabling this feature it will make your site much more manageable than the alternative.
WAIT FOR EMAIL CONFIRMATION
Wait for Email Confirmation is a good option if you want to have the server delete posts and users who dont confirm their email addresses.
Another time and spam saving feature, by enabling this feature it will make your site much more manageable than the alternative.
REQUIRE EMAIL CONFIRMATION
Require Email Confirmation is the setting where users who register on your site have to confirm their email addresses.
This cuts down on spam dramatically. Users may still register, but if their email addresses cannot be verified their posting privileges will not be active.
Users can post on the website, but they will have to confirm with an email every time, this will help you build a user base if only for your users to avoid having to confirm every time.
ADMIN AREA
Set how your admin operates.
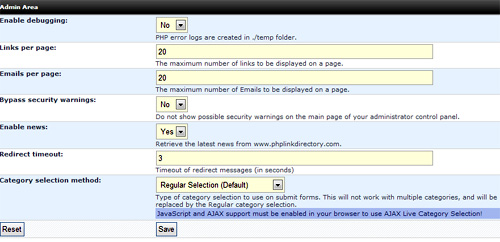
ENABLE DEBUGGING
Turn on or off PHP error logs.
LINKS PER PAGE
Set amount of links to be displayed in Links or Approve links pages.
EMAILS PER PAGE
Set amount of emails to be displayed per page.
BYPASS SECURITY WARNINGS
To display or not possible security warnings on the main page of your administrator control panel.
ENABLE NEWS
Show latest news from PHPLD on your main admin page.
REDIRECT TIMEOUT
Set time for redirect messages
CATEGORY SELECTION MESSAGE
Type of category selection to use on submit forms. This will not work with multiple categories, and will be replaced by the Regular category selection.
PAYMENT SETTINGS
If you want to make money from your directory, the payment section is important to you.
This section allows you to add your PayPal id. Below is what this menu looks like:
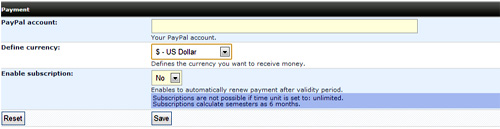
PAYPAL ACCOUNT
Here is where you put your PayPal account email address, so you can receive payments as they come in from your directory.
Make sure you put the right account name! At this time, phpLD only works with PayPal,
but we hope to have other options available to our customers in the future with new releases.
DEFINE CURRENCY
Define Currency allows you to choose from one of the currently 6 supported currency types.
The default type is USD$ currency but you can select any of the other available currency types here to suit your needs.
Try to remember to sync your currency type with the same currency you use in PayPal to keep your fees straight.
If you have users who have a different currency than you, click here for an excellent currency calculator.
Remember to recalculate your prices every couple of months!
ENABLE SUBSCRIPTIONS
Allows you to set up PayPal subscription payments for time limited links!
LINK SUBMIT
The Link Submit category allows you to set the requirements for a proper submission to your link directory.
Here you can have complete control over all the link options, here is what the window will look like:
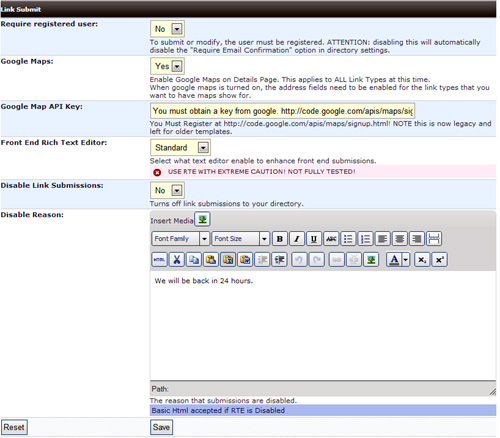
REQUIRE REGISTERED USER
The Require Registered User makes users submitting a link register as a user before being able to submit a link.
This helps keep spam and unwanted content out, and helps you keep control on your directory.
If youre just starting out and not too worried about spam or unwanted content, you can select no and change this later when it becomes a problem.
REQUIRE RECIPROCAL LINK
Require Reciprocal Link requires anyone submitting a link to also link back to your directory.
This will help your PageRank status, and can help build quality backlinks throughout the internet.
REQUIRE A URL ON SUBMIT FORM
The Require A URL On Submit Form setting allows you to have users make submissions without requiring they submit website information
like a url or link back. You can also enable it to require a URL or link back for SEO purposes.
If your site is new, it might be a good idea to have this enabled to gain a web presence in a shorter amount of time.
GOOGLE MAPS
The Google Maps setting allows phpLD to show the location of your business or other information when a link is submitted using Google Maps.
You'll need a Google API key to use this function. This is great for directories who index businesses, restaurants, and schools just to name a few.
GOOGLE MAP API KEY
Not needed now as we use v3 maps. This is where you insert your Google API key in order to allow the above Google Maps function to work properly.
If you don't already have a Google API key, you can get one by going to this link:
http://code.google.com/apis/maps/signup.html
http://code.google.com/apis/maps/signup.html
FRONT END RICH TEXT EDITOR
Select the editor you want your visitors to use on submission..
DISABLE LINK SUBMISSIONS
This turns on or off front end submissions..
DISABLE REASONS
The text you enter in this box will display on front end if someone try's to submit a link if above is disabled.
FEATURED LINKS
Featured links are displayed and highlighted at the top of the pages in the categories they are featured on.
This is one of the main services that many directories charge submitters and extra fee for. In order for this feature to function you must fill out the following fields

MAX. FEATURED LINKS
Max Featured links sets the maximum number of featured links accepted per category.
The default is set at five, but you can increase or decrease this as needed, but remember this is just per category, not the entire site!
RECIPROCAL LINK SETUP
Setup reciprocal link rules.
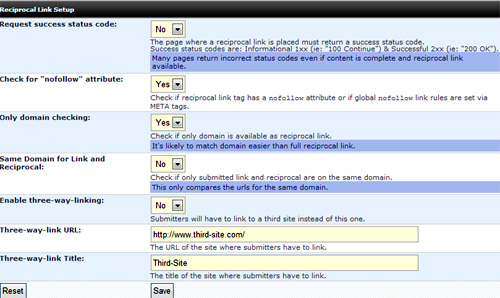
REQUEST SUCCESS STATUS CODE
The page where a reciprocal link is placed must return a success status code.
CHECK FOR NOFOLLOW ATTRIBUTE
Check if reciprocal link tag has a nofollow attribute or if global nofollow link rules are set via META tags.
ONLY DOMAIN CHECKING
Check if only domain is available as reciprocal link.
SAME DOMAIN FOR LINK AND RECIPROCAL
Check if only submitted link and reciprocal are on the same domain.
ENABLE THREE WAY LINKING
Submitters will have to link to a third site instead of this one.
THREE WAY LINK URL
The URL of the site where submitters have to link.
THREE WAY LINK TITLE
The title of the site you want the submitters to link too.
LINK RATINGS
Turn on or off link comments.
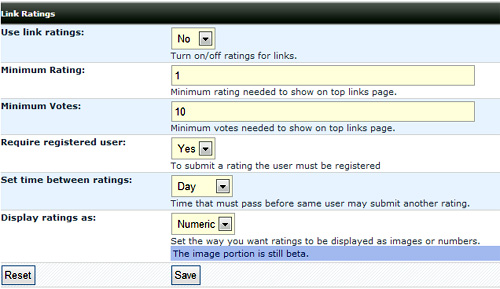
USE LINK RATINGS
Turn on/off ratings for links.
MINIMUM RATING
Minimum rating needed to show on top links page.
MINIMUM VOTES
Minimum votes needed to show on top links page.
REQUIRE REGISTERED USER
To submit a rating the user must be registered
SET TIME BETWEEN RATINGS
Time that must pass before same user may submit another rating.
DISPLAY RATINGS AS
Set the way you want ratings to be displayed as stars, bars or numbers.
AUTHOR INFO
Set author settings for articles.
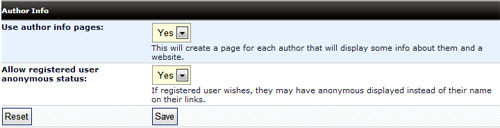
USE AUTHOR INFO PAGES
This will create a page for each author that will display some info about them and a website.
ALLOW REGISTERED USER ANONYMOUS STATUS
If registered user wishes, they may have anonymous displayed instead of their name on their links.
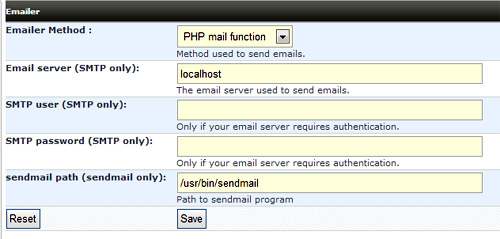
EMAIL CONFIG
Select site email delivery method.
EMAIL TEMPLATE SETUP
Choose and alter pre written email templates for notification, approve, reject and other system emails.
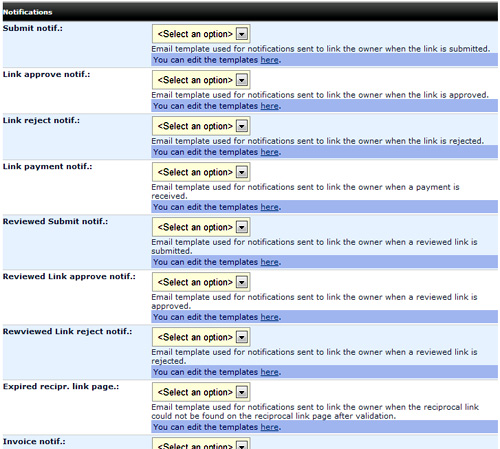
Select email by using dropdown on each type.
Select email by using dropdown on each type.
SEARCH ENGINE OPTIMIZATION
SEO (Search Engine Optimization) is very important when running a website. It makes you friendly to search engines for indexing.
These settings help you get the best out of phpLD with little to no SEO experience of your own.
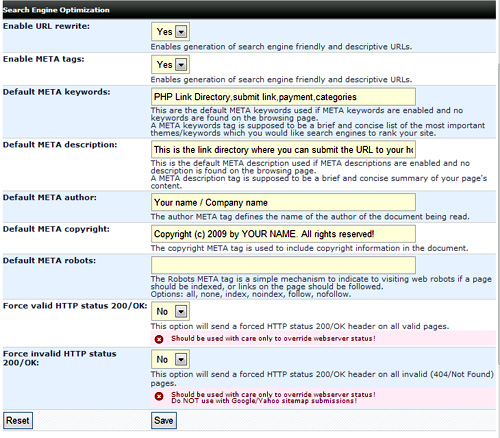
ENABLE URL REWRITE
Enable URL Rewrite enables phpLD to create descriptive and search engine friendly URLs (web addresses)
for your pages making them likely to get better search engine positioning when they are indexed.
REWRITE OUTPUT
This option allows you to rewrite the output for a nice looking URL.
You can tinker with this option or leave it alone at its default status. Most users find the default option to work fine for their needs.
OUTPUT EXTENSION
Output Extension will let you choose the extension; the default is .
HTM We suggest you leave this set at the default unless youre an advanced user who knows what theyre doing.
ENABLE META TAGS
Enable Meta Tags so phpLD will insert your Meta information into the pages it creates.
This will help ensure better search engine placement. If for some reason you need to disable this, just change it from the default option to no.
DEFAULT META KEYWORDS AND DESCRIPTION
Default Meta Keywords And Description option gives permission to phpLD to assign categories and pages Meta Tags if they dont have any assigned by you.
This should be turned on by default for the best SEO for your site. It can be disabled by selecting no.
DEFAULT META COPYRIGHT DISPLAYS THE COPYRIGHT META TAG ON YOUR PAGES
This option displays the copyright META tag on your pages. Its a good idea to publish your copyright on all of your pages,
just in case you have to deal with plagiarism issues.
DEFAULT META ROBOTS
Default Meta Robots is a simple mechanism that allows you to indicate to search engines if a page should be indexed,
or links on the page should be followed. No-follow links can be permitted in case you want links to be published on
your directory and not increase PageRank of someone elses site.
IMAGE VERIFICATION
phpLD uses captcha to protect its users from spam and undesirable links. You may disable this option, but it is not recommended.
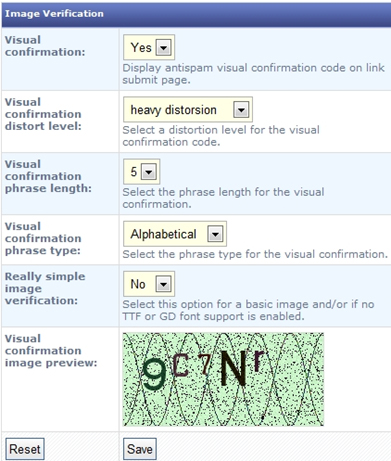
VISUAL CONFIRMATION
Visual Confirmation turns on captcha for verification. Captcha prevents a great deal of spam, so it's a good idea to turn it on.
VISUAL CONFIRMATION DISTORT LEVEL
Visual Confirmation Distort Level is where you can choose the distortion level for your captcha images,
so auto submit bots can't understand as easily. The more distorted the harder it is for bots to get by it,
but keep in mind some of your visitors might have trouble with it as well, so try to find the sweet spot where you can keep bots out and let visitors in.
VISUAL CONFIRMATION PHRASE LENGTH
Visual Confirmation Phrase Length allows you to set the numbers generated in the captcha image.
It's a good idea to test this out before you implement it permanently, so you can ensure spam protection and ease of use for your visitors.
VISUAL CONFIRMATION PHRASE TYPE
Choosing your phrase type allows you to choose the type of characters that are displayed and required to be typed in by the user.
You have the choice of Alphabetical, Alphanumeric, and Numeric. No special symbols are allowed, so it will always be standard letters and numbers.
REALLY SIMPLE IMAGE VERIFICATION
Really Simple Image Verification allows someone with a server setup that can't run CAPTCHA system still use image verification.
Selecting less enables the simple image verification system. This is a less secure but an alternative way to provide some security
in the event you are on a server not equipped to handle the CAPTCHA system.
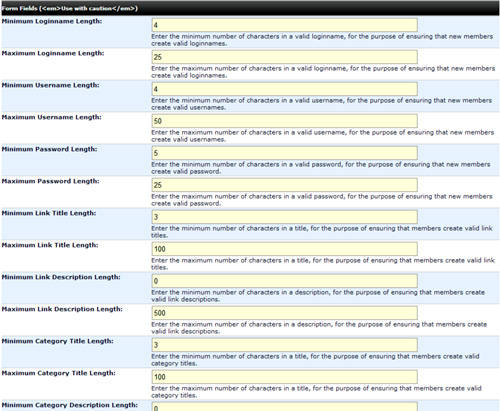
FORM FIELDS
Set the minimum and maximum amount of characters for each field in your site forms.
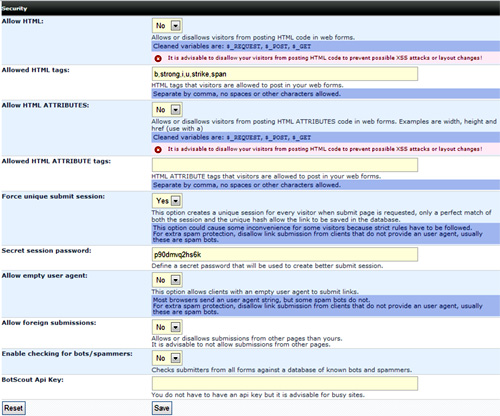
SECURITY
Set the security of your directory. Determine what's allowed and not allowed in the submission to your directory
EMAILER
This can be used on a limited basis to contact people who are registered in your directory.
SEND EMAIL
Here you can send email, through your site, for things like official site notices, announcements, and more.
SEND EMAIL AND ADD LINK
Same as above, but you can add a link in these.
SEND NEWSLETTER
Here you can send an email to registered users and it will show you the progress. You may want to use the Send Test Email feature first to test
before sending to the whole list.
LINK COMMENTS
USE LINK "TELL A FRIEND FUNCTIONALITY
USE LINK COMMENTS
REQUIRES REGISTERED USER
VISUAL CONFIRMATION ON COMMENT SUBMISSIONS
AUTO APPROVE COMMENTS
AUTO APPROVE COMMENTS AMOUNT